
 Pin it
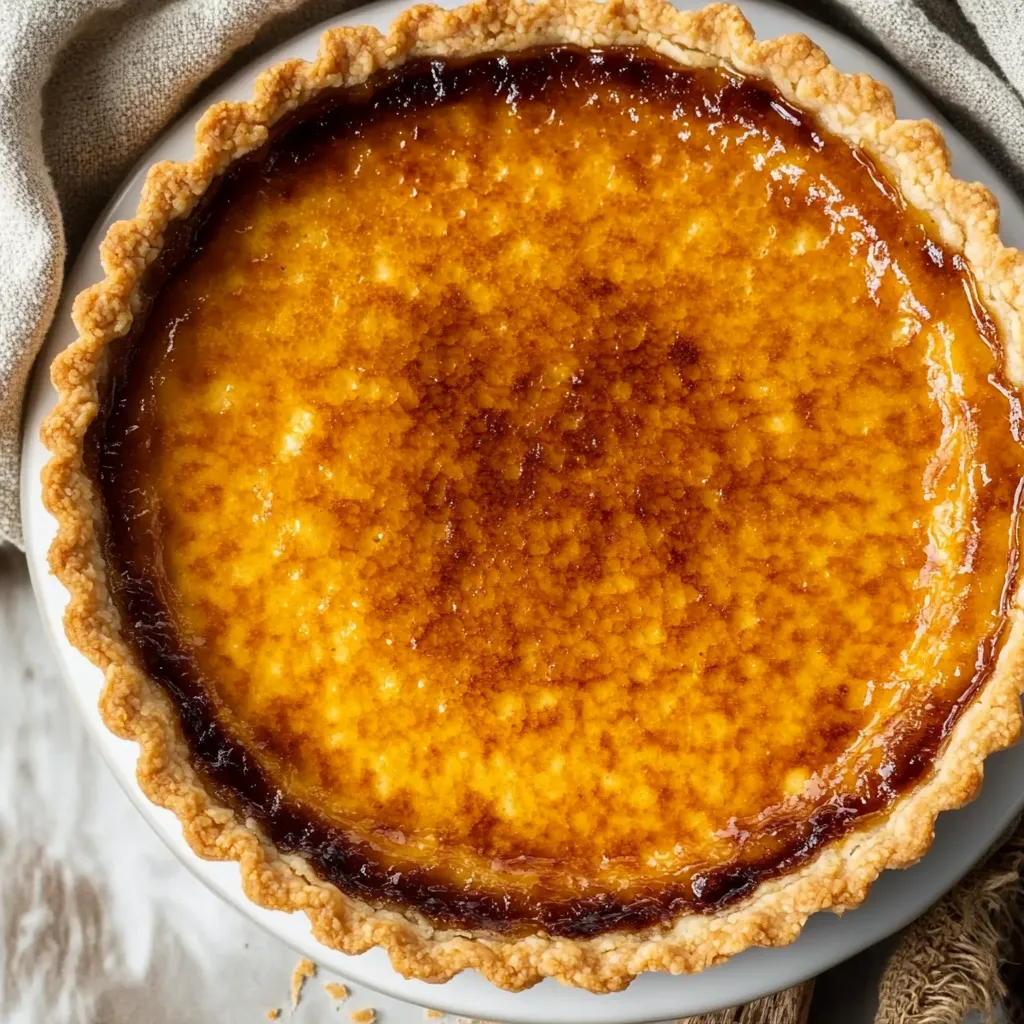
This velvety Burnt Sugar Custard Tart blends a crispy caramelized top from traditional French dessert techniques with deep, luscious caramel notes everyone loves. After tweaking this dessert countless times in my kitchen, I'm sure this fancy tart will soon be your go-to showstopper for important gatherings.
The first time I whipped up this tart for my sister's birthday, the whole table went quiet when everyone broke through that sugar crust. All you could hear was happy mumbling. Now my family wants it at every get-together.
Ingredients
- Shortcrust Pastry: Regular flour gives you that snappy base that won't go soggy under the filling
- Light brown sugar: Brings gentle caramel hints that work with the main filling
- Cold butter: Don't let it warm up before using or you'll lose that flaky goodness
- Cold egg and water: They stick everything together without making the crust hard
- Crème Brûlée Filling:
- Heavy cream: This makes everything feel smooth and rich in your mouth
- Egg yolks and whole egg: They turn into that soft, smooth custard texture
- Store bought thick caramel sauce: Cuts down your work but still tastes amazing - try to find Bonne Maman or something just as good
- Salt: Makes the caramel pop and balances everything out
- Caster sugar: For that crackling top layer - it burns more smoothly than regular sugar
Step-by-Step Instructions
- Mix Your Crust:
- Throw flour, sugar, cold butter and salt in a food processor until the butter looks like tiny lentils. These butter bits will make your crust super flaky. Add egg and pulse until it looks like breadcrumbs, but don't go overboard or your crust will turn tough. While the machine runs low, drip in cold water until stuff starts clumping. The mix should stick when you squeeze it but shouldn't feel wet.
- Shape and Cool the Dough:
- Dump everything onto a lightly floured counter and fold it a few times just until it comes together. Handling it less keeps things cold and your crust tender. Roll it out to about 4mm thick and 11 inches around, moving it now and then so it doesn't stick. Use your roller to help lift the dough into a 9 inch tart pan. Push it firmly into the corners and sides, leaving the extra hanging off. Stick it in the fridge for at least 2 hours or overnight so the dough can relax.
- Pre-Cook the Shell:
- Heat your oven to 180C/350F. Poke holes all over the bottom with a fork to stop bubbles. Cut off the extra dough by running a knife along the pan edge. Put baking paper inside and fill it up with pie weights or rice, pushing them to the edges so the sides don't shrink. Bake for 15 minutes, take out the weights and paper, then bake 8 more minutes until it's starting to look golden. Let it cool completely before you fill it.
- Make the Filling:
- Turn your oven down to 160C/320F. Warm the cream until it's steamy but not boiling, or you'll mess up the proteins. In another bowl, mix egg yolks, whole egg, and caramel sauce until they're totally combined. Slowly pour half the warm cream into the egg mix while stirring gently, then add the rest. Going slow keeps the eggs from cooking too early.
- Pour and Bake:
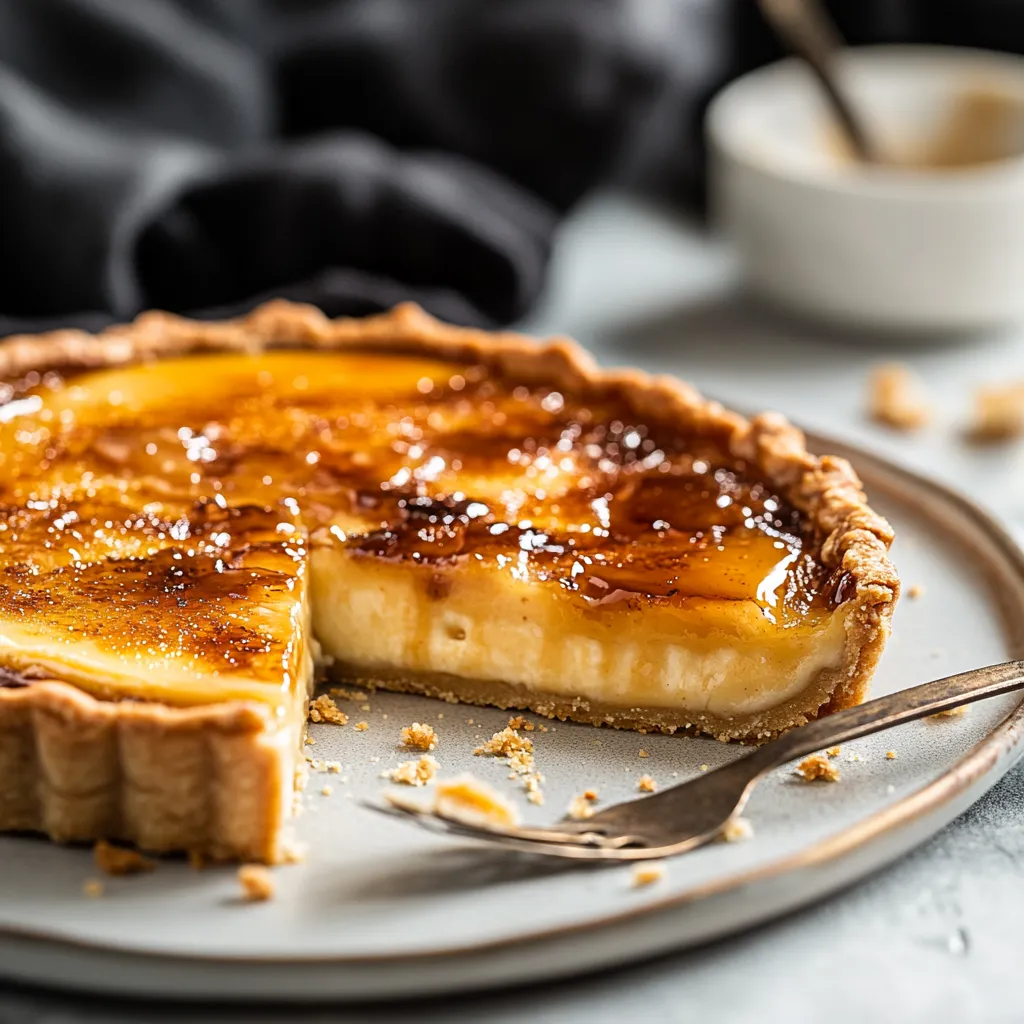
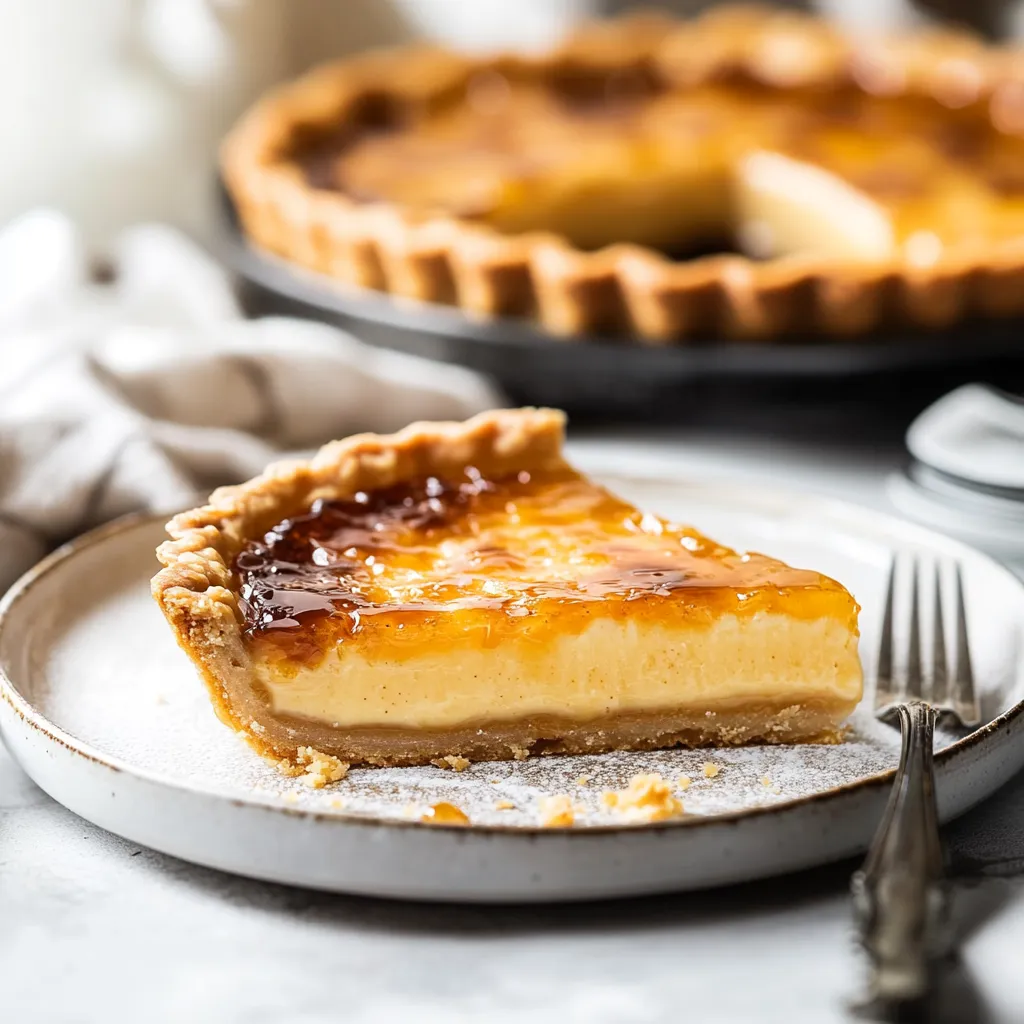
- Strain your custard mix to catch any cooked egg bits for the smoothest result. Scrape off any foam floating on top. Pull your oven rack out partway and put the tart shell on it for easier filling without spills. Pour the custard in, filling it almost to the top. Get rid of any bubbles by gently running a spoon over the surface. Bake for 35-40 minutes until it wobbles a bit but isn't runny. It'll firm up more as it cools.
- Chill and Torch:
- Let the tart sit for 20 minutes at room temp, then put it in the fridge for at least 2 hours to set completely. Right before you serve it, sprinkle a thin, even layer of caster sugar on top and use a kitchen torch to melt it until you get a crispy amber-colored layer.
 Pin it
The store-bought caramel really makes this dessert special. I tried lots of versions and found that good quality pre-made caramel actually gives more reliable results than making it from scratch each time. My grandma always told me that shortcuts are fine when they don't mess with the taste.
Make Ahead Tips
This tart is great for parties because you can prep most of it beforehand. The dough can hang out in your fridge for up to 3 days before rolling, or you can freeze it for a month. Once baked, the empty tart shell keeps at room temp for 2 days if wrapped up well. The finished tart stays good in the fridge for up to 2 days, but always save the sugar torching for right before serving so it stays crunchy.
Troubleshooting
If your crust shrinks while baking, you probably worked the dough too much or didn't chill it enough. That cold rest time really matters to stop shrinking. Got cooked spots or lumpy custard? Your oven was too hot or you baked it too long. Good custard should jiggle evenly when you give it a little shake. If your sugar top doesn't harden properly, you likely put it on too thick or not evenly. A thin, even sugar layer works best for that satisfying crack.
Serving Suggestions
Let this tart warm up a bit from the fridge before serving so you can taste all the flavors. That mix of cool, silky custard with the warm, crackly sugar top is just amazing. A tiny bit of lightly whipped cream on the side works well, though the tart looks beautiful all by itself. When I have guests over, I like to do the sugar torching right at the table for a bit of drama, and it never fails to wow everyone.
 Pin it
This smooth, gorgeous tart shows how just a few good ingredients can come together to make an unforgettable dessert you'll want to make again and again.
Frequently Asked Questions
- → Can I get this ready a day early?
Definitely. Make the tart up to 2 days in advance, including the filling, and chill it. Don’t add the sugar topping until just before you serve, then torch it to get that crispy texture fresh.
- → What if I don’t have a blowtorch?
No worries! Set your tart under a very hot broiler for about 1-2 minutes to caramelize the sugar. Keep an eye on it to avoid burning, and make sure the tart is well-chilled beforehand for best results.
- → Can I swap store-bought caramel for homemade?
Absolutely! Homemade caramel works great here. Just make sure it’s thick, cooled completely, and ready to stir into the custard filling.
- → Why is it important to strain the custard?
This step gets rid of any egg pieces that might have cooked while tempering, ensuring the filling stays smooth and creamy with no lumps.
- → How do I tell when the filling is done?
It’s ready when the center jiggles just slightly but isn’t liquid. The edges will be firmer than the middle, which will naturally set as it cools completely.
- → Can I freeze this dessert?
If needed, only freeze the baked crust. The custard filling doesn’t hold up in the freezer as it can separate. It’s best to eat this fresh or keep it refrigerated for up to three days.