
 Pin it
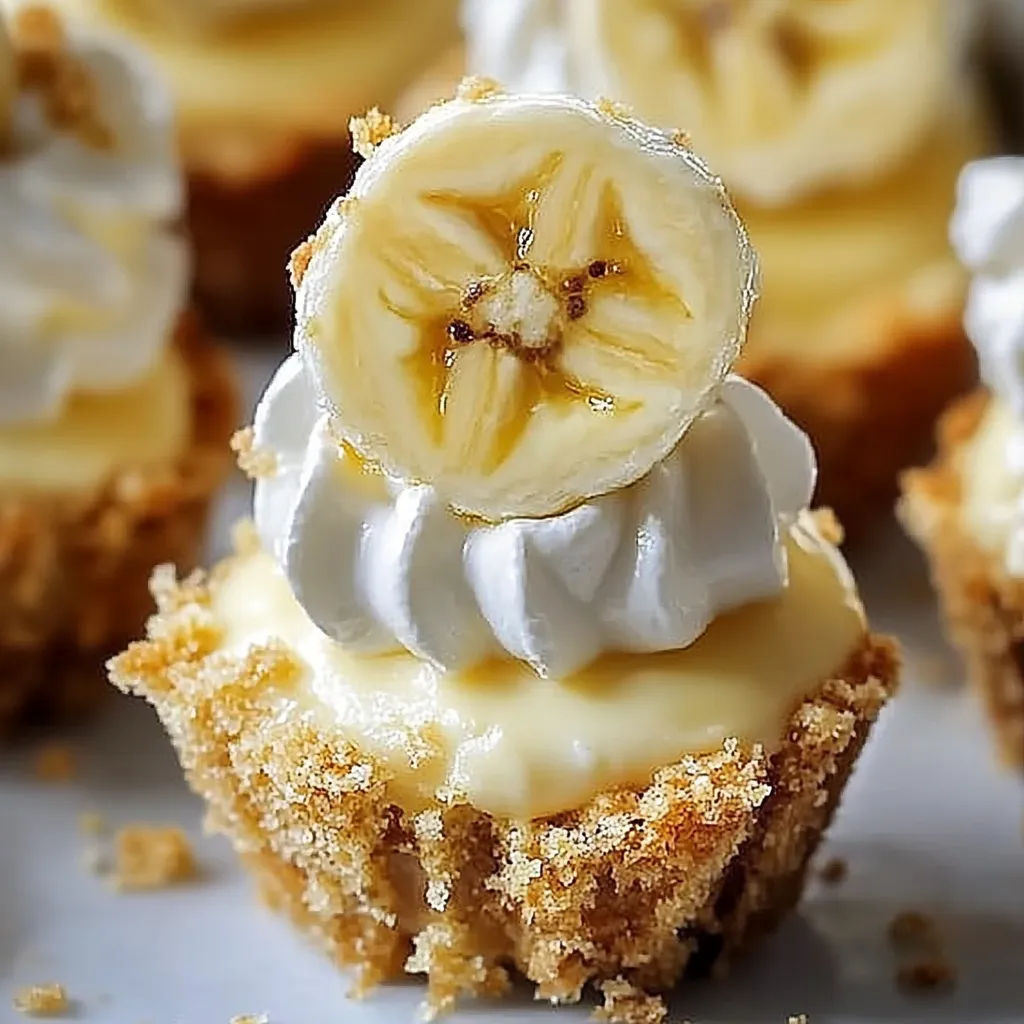
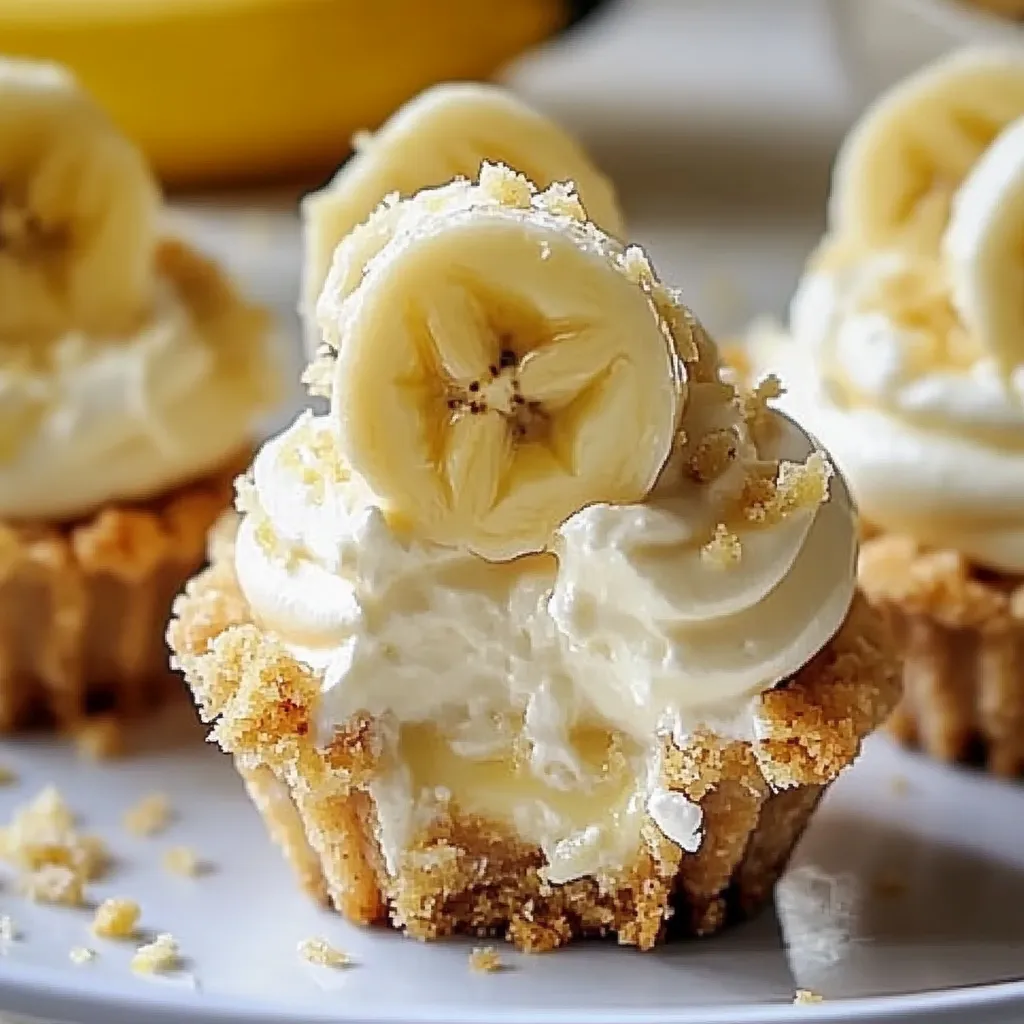
These adorable mini banana cream pies turn basic ingredients into personal dessert treats that'll wow at parties or family meals. Their grab-and-go size works great for sharing while packing all that smooth banana taste you love without dealing with cutting slices.
I whipped these mini pies up for my niece's party when I needed something quick that wouldn't need serving utensils. They vanished quicker than anything else on the table, and now my family won't let me show up without them.
Ingredients
- Instant vanilla pudding mix: Makes a smooth base without any fancy cooking steps
- Cold milk: Helps the pudding set up with just the right thickness
- Fresh bananas: Add that naturally sweet taste everyone loves
- Graham cracker crumbs: Give you that pie crust feel without all the work
- Unsalted butter: Holds your crust together and lets you add salt how you want
- Whipped cream: Tops everything off with a fluffy touch that cuts through the richness
Step-by-Step Instructions
- Prepare the Filling:
- Mix the vanilla pudding powder with cold milk in a bowl for about 2 minutes until it starts getting thick. You want it firm enough to stay put but still easy to pour. Let it sit for around 5 minutes to thicken more while you work on the crusts.
- Create the Crust Base:
- Stir graham cracker crumbs and melted butter together until all crumbs look wet. You should be able to squeeze it and have it stick without feeling too greasy. If it's falling apart, add another spoonful of melted butter.
- Form the Crusts:
- Split the graham mix evenly into your mini tins or muffin tray. Take a small glass or measuring cup to push it down firmly on the bottom and a bit up the sides. Push hard—this helps your crusts stay together better.
- Begin Assembly:
- Drop about a tablespoon of pudding into each crust. This thin layer keeps the bananas from making the crust soggy. Use your spoon to flatten it out nice and even.
- Add Banana Layer:
- Cut bananas into small rounds and lay them in one layer on top of the pudding. Pick bananas with a few brown spots but still hard enough to slice cleanly for the best taste.
- Complete the Filling:
- Cover the bananas with the rest of your pudding, sharing it evenly between all crusts. Fill them almost to the top, leaving just a bit of space for whipped cream if you want. Smooth the tops with a spoon for a nice look.
- Chill Until Set:
- Put your mini pies in the fridge for at least an hour, though four hours is even better. The cold time helps everything firm up and the flavors blend together.
 Pin it
The vanilla pudding really makes this dessert shine. My grandma always put a tiny bit of almond extract in her pudding mix, giving it this amazing flavor that nobody can quite figure out. I keep doing it her way and love watching people try to guess what makes it so special.
Keeping Bananas Fresh-Looking
Banana slices turn brown when they sit out too long. To keep your mini pies looking pretty, especially if making them way before serving, try dunking your banana pieces in lemon juice first. The acid stops them from browning without changing the flavor much. Another trick is to sandwich the banana slices between pudding layers instead of putting them on top, which also keeps them from changing color.
Mix It Up Your Way
These little banana cream pies work great as a starting point for making the dessert your own. Try adding some caramel under the bananas for a banoffee style treat. If you're crazy about chocolate, throw in some mini chocolate chips or drizzle chocolate sauce over the top. Want something tropical? Mix coconut into the graham cracker base and sprinkle toasted coconut on top.
Prep Ahead Tricks
Though these taste best within 24 hours, you can get a head start on making them. The graham cracker bases can be fixed up to three days before and kept in the fridge. You can mix the pudding up to two days ahead and store it covered in the fridge. For the best-looking dessert, don't add the bananas until within 8 hours of serving so they don't get mushy or dark.
 Pin it
Dig into these tasty little pies with their perfect mix of smooth, sweet, and crunchy textures—they'll win over everyone who tries them!
Frequently Asked Questions
- → Can I make these tiny banana pudding cups beforehand?
You can make them up to a day early. For the best taste though, add your banana slices no more than 4-6 hours before you'll be eating them. Keep them covered in your fridge until it's time to serve.
- → What can I swap for graham crackers in the base?
Try vanilla wafers, digestive biscuits, shortbread, or even chocolate cookies. Just crush them up fine and use the same amount the recipe asks for.
- → How do I stop the bananas from going brown?
The pudding layer helps shield bananas from air. You can also dab a bit of lemon juice or pineapple juice on your banana slices before adding them. The acid stops browning and barely changes the taste.
- → Can I use homemade pudding instead of the mix?
Sure thing! Homemade vanilla custard works great in these cups. Just let it cool and thicken properly before you layer it with bananas. You'll need about 2 cups to replace the instant mix and milk combo.
- → What size muffin pans should I use?
Regular muffin pans (about 2½ inches across) work well. For bigger portions, try jumbo muffin pans. With standard pans, you'll get around 12 little cups, depending on how thick you make your bases.
- → Can I freeze these tiny banana pudding cups?
They don't freeze well because of the fresh bananas and pudding. When thawed, the texture gets weird - bananas turn mushy and the filling might separate. They're best eaten fresh within a day or two after making them.