
 Pin it
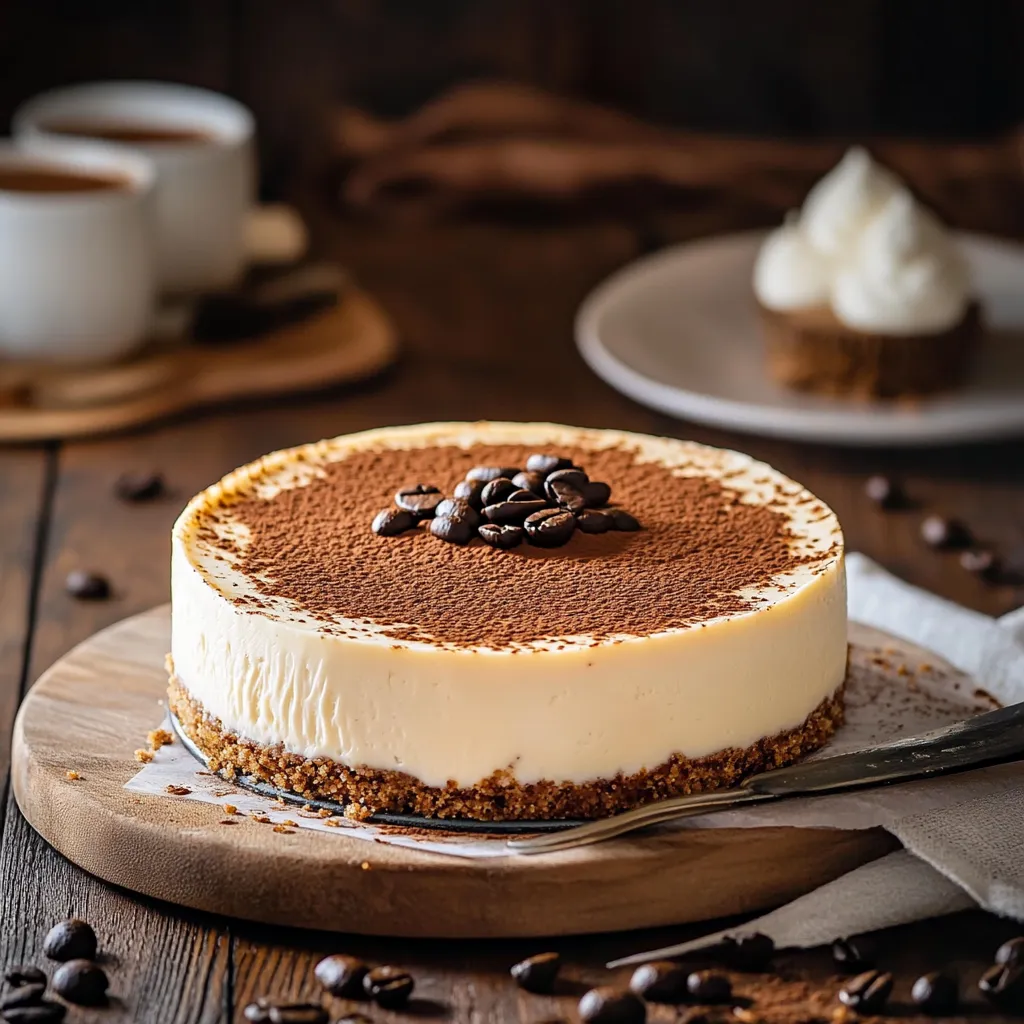
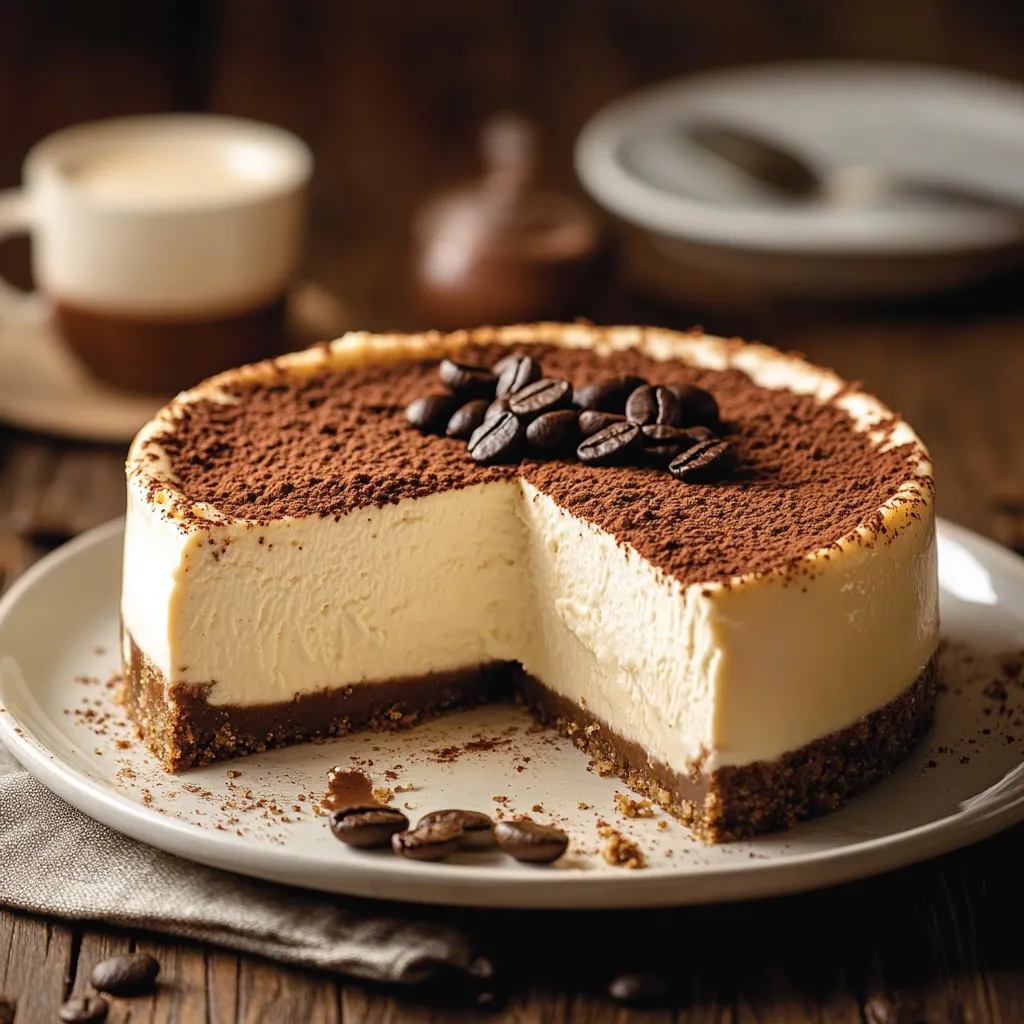
Silky coffee cheesecake brings together smooth, dreamy cheesecake and rich, bold coffee in every forkful. You'll get just the right mix of sweet, creamy goodness with that delicious hint of roasted coffee that makes your taste buds wake up. The smooth coffee-infused filling and the crisp, buttery graham base make it perfect if you love both dessert and a strong cup of joe. The coffee flavor is bold and comforting, creating a treat that's both cozy and a little fancy, perfect for sharing or savoring solo.
My love for coffee cheesecake started when I sat in a Vienna café and had a bite of their famous coffee cake. That creamy, coffee-packed dessert was unforgettable. I spent a bunch of tries getting the coffee-to-cheese just right at home, and finally served it at my sister's engagement get-together. Guests ate it up so fast, I barely snagged a piece. People snuck seconds, and pretty soon everyone wanted to know how to make it. Ever since, it’s been the go-to for every big family event.
Irresistible Baking Ingredients
- Cinnamon: Toss a little into the crust for warmth and a cozy taste that makes the coffee pop.
- All-purpose flour: Helps hold the filling together without letting it get soggy.
- Pure vanilla extract: Adds a sweet, comforting aroma so each bite feels special.
- Heavy cream: Gives the filling extra velvety smoothness and richness.
- Sour cream: Adds just a bit of tang so the cheesecake isn’t too sweet to handle.
- Large eggs: Make sure the cheesecake sets up right while staying soft.
- Instant coffee or espresso powder: Packs a punch of coffee flavor all the way through.
- Granulated sugar: Softens the bite from the coffee and keeps the flavors well-balanced.
- Cream cheese: The key to that creamy, rich, slightly tangy texture everyone craves.
- Butter: Holds the crust together and makes every slice flavorful and rich.
- Graham crackers: Brings sweetness and that classic crumbly base to set off the filling.
Handcrafted Steps
- Baking Method:
- Pop into a 325°F oven and bake till the edges are set but the middle gives a little jiggle. Crack open the oven door and leave it to cool slowly so you don’t get any cracks on top.
- Mix in the flour:
- Sift flour right over your batter and carefully fold it in so your cheesecake stays thick and fluffy.
- Eggs Go In:
- Add eggs one-by-one, mixing each just until they blend in. Don’t overmix, or you'll get cracks later.
- Add the coffee:
- Mix instant coffee or espresso powder with a splash of hot water till it’s strong and totally dissolved. Let it chill a moment before mixing in, that way your batter won’t split.
- Work the cream cheese:
- Let cream cheese blocks get nice and soft at room temp, then beat till they’re totally lump-free. Stop every so often to scrape down the bowl so it’s all mixed evenly.
- Crust First:
- Blitz graham crackers up fine, then stir in melted butter. Press mixture into a springform pan gently with a cup till tight and even.
 Pin it
I first realized how coffee boosts dessert flavors while in culinary school, watching my teacher add just a bit to other sweets. My family loves how this cheesecake brings winter celebrations to the next level with its bold flavor. When my daughter asked for it at her wedding instead of plain cake, I knew it had become our own family tradition.
Astonishing Dessert Backstory
This creamy treat is one of humanity’s oldest lasting sweets, first whipped up in ancient Greece. The classic New York style came around in the early 1900s, when folks swapped in cream cheese. Later, European coffee culture meant it was only a matter of time before we started adding coffee to make it even better.
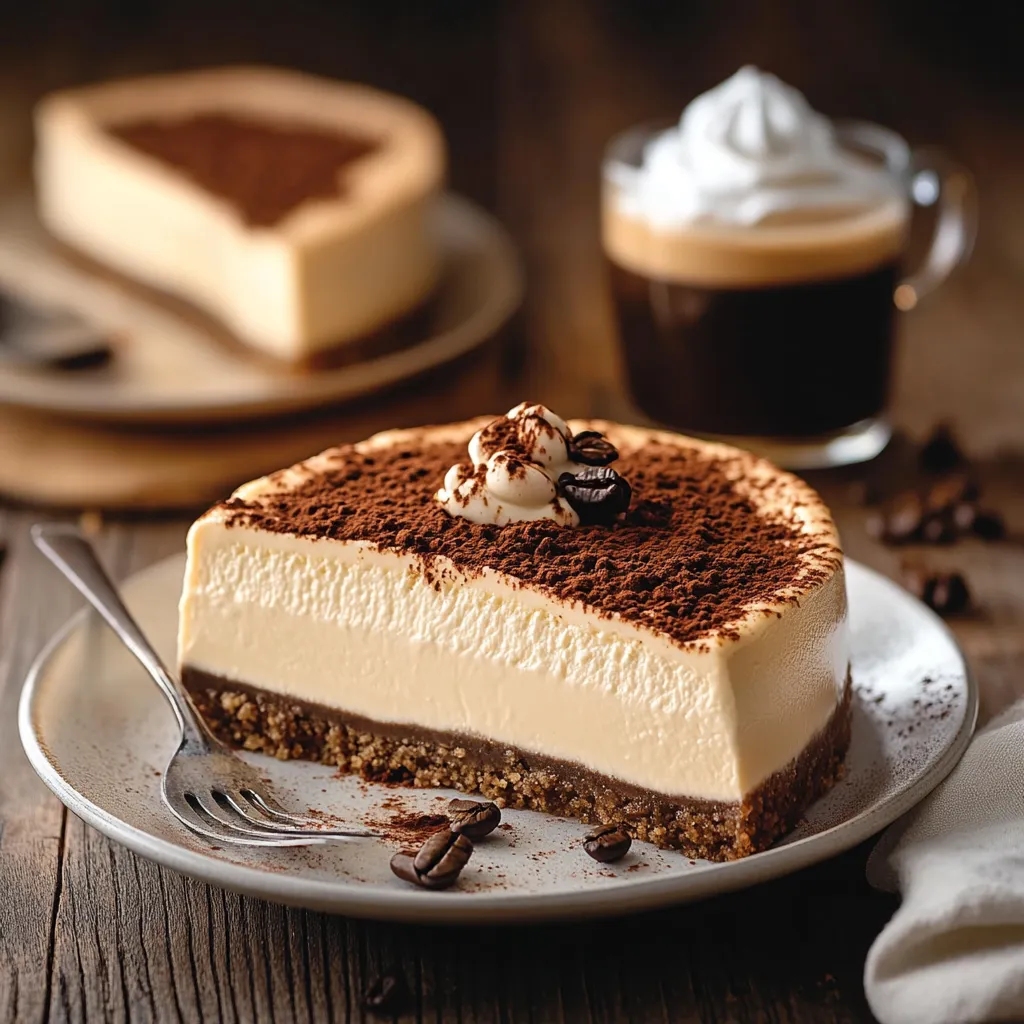
Upscale Ways to Enjoy
Top with espresso whipped cream, pair with chocolate covered shortbread, or give each serving a drizzle of chocolate-coffee sauce. Want to impress? Try edible gold or chocolate espresso beans for a finishing touch.
Unique Flavor Twists
Mix in melted dark chocolate for a rich mocha vibe, shake in cozy spices and maple for something different, or punch it up with a splash of coffee liqueur like Kahlúa or Bailey’s.
Long-Lasting Storage Know-How
Keep leftover cheesecake cold in a sealed container up to five days. Want to save some for later? Freeze single slices for up to three months, and just defrost in the fridge when you’re ready.
 Pin it
What I love most about this dessert? Watching it bring everyone together. People really taste and appreciate each layer. Nothing makes me happier than seeing that first-bite smile, when a familiar favorite gets a lift from the magic combo of cheesecake and coffee.
Frequently Asked Questions
- → Is it possible to make this Effortless Coffee Cheesecake if I don’t have a springform pan?
- Definitely! Just grab a regular 9-inch cake pan and line it with parchment, with plenty sticking up to help pull the cheesecake out later. Once it’s cooled and set, lift it carefully using the edges. It might not look perfect, but it’ll taste fantastic.
- → How noticeable is the coffee in this cheesecake?
- There’s a nice coffee vibe but nothing super intense. It’s more about a hint of coffee that mixes well with the creamy base. Craving extra coffee punch? Use 2 tablespoons of instant coffee or go for espresso powder for that real depth.
- → Is this cheesecake okay to keep in the freezer?
- For sure—you can freeze it up to a couple of months. Let it fully cool, then chill it in the fridge before wrapping tightly to freeze. Slices or whole, either way works. Pop it in the fridge overnight to thaw, and save your glaze for after.
- → How come my cheesecake cracked, and what’s the trick to stop that?
- Mostly it’s too much mixing, leaving it in the oven too long, or sudden temp changes that make those cracks. To help, mix gently once eggs go in, bake with a pan of water underneath, and let it chill slowly by turning off the oven and cracking the door for about an hour before pulling it out.
- → Is it doable to make this treat dairy-free?
- Oh yeah! Try dairy-free cream cheese, swap the sour cream with coconut cream, and go for plant-based butter in your crust. It’ll be a little different but still pretty tasty. You just want everything at room temp to keep it nice and smooth while mixing.