
 Pin it
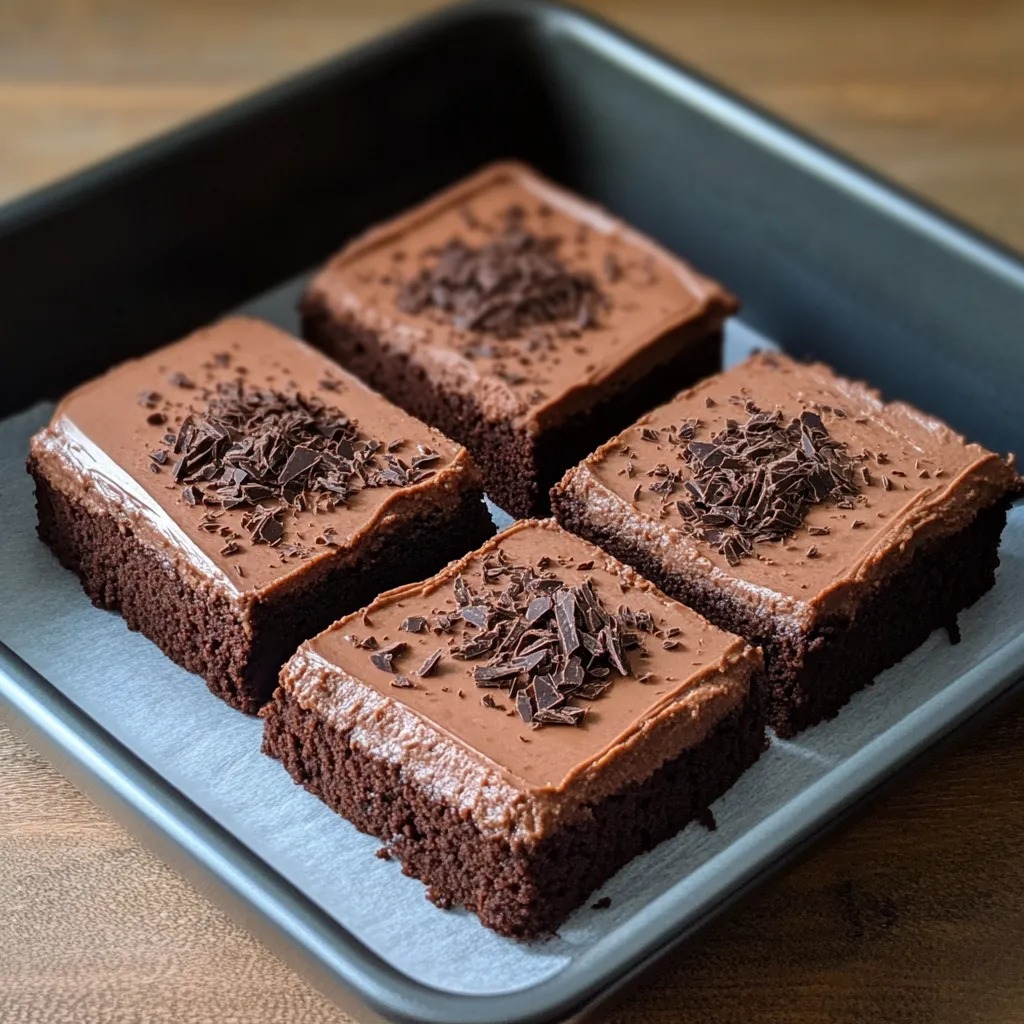
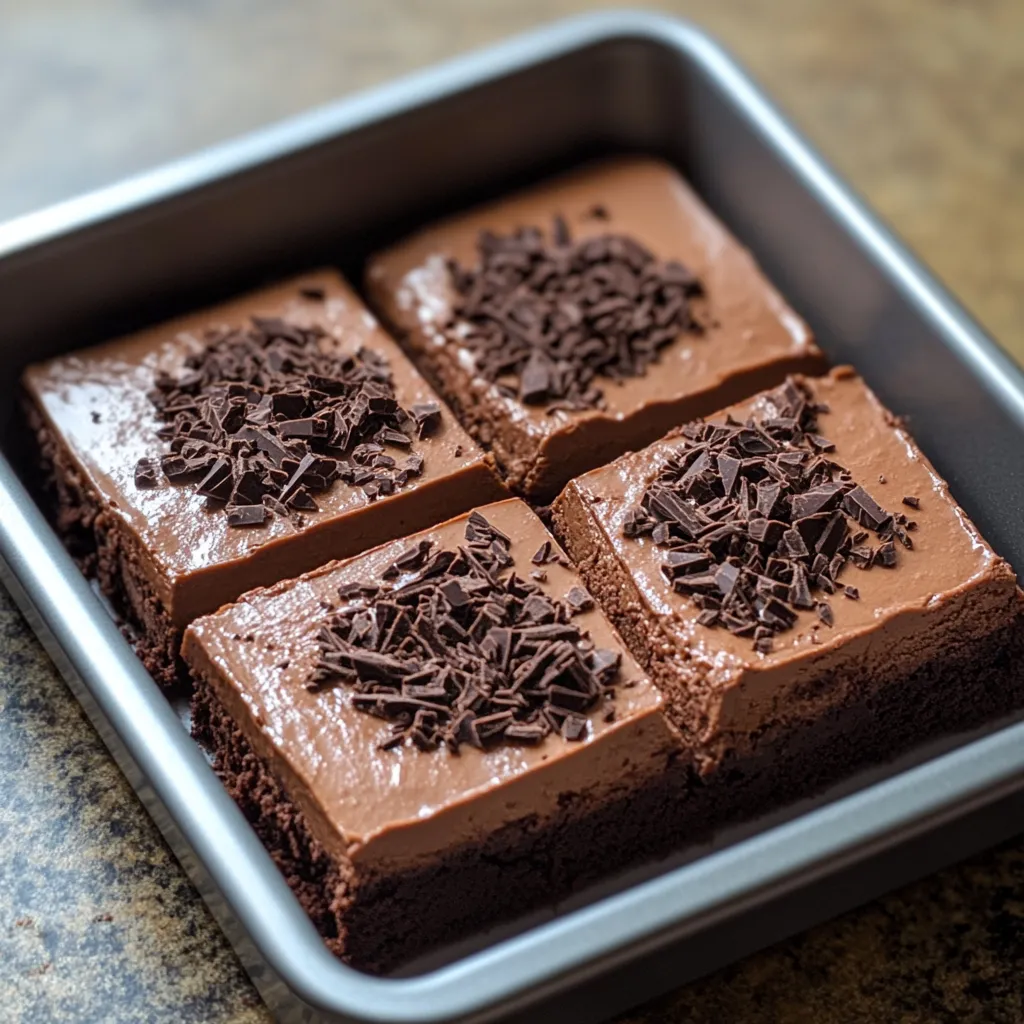
These brownies are a mix of three awesome chocolate layers that’ll wow anyone. The bottom is a dense, chewy brownie that holds everything together. On top, you get a light-as-a-feather chocolate mousse that’s super smooth and chocolatey without being heavy. To finish things off, a shiny ganache cap brings bold chocolate flavor and a beautiful shine. Cut into squares, you’ll see all those chocolate layers showing off, which looks just as good as it tastes. It’s all everyday ingredients, but some patience makes it a total showstopper.
Just last month, I took a batch of these to a block party, all set up on an old platter from my grandma. People dug in right away—some even thought I picked them up from a local bakery! Folks were shocked when I said it was a three-step process. What really made me laugh was watching the so-called “willpower champs” go back for seconds because that mix of light and rich really gets you.
Loaded Ingredients
- Unsweetened cocoa powder (good quality): Gives that deep chocolate kick without extra sugar. Dutch-process works great if you don’t want that sharp, acidic tang. Fresh cocoa is way more fragrant and tastes better.
- Eggs at room temp: They blend in easier so your batter gets nice and smooth. Yolks give moisture, whites help hold things together.
- Vanilla extract (real, not fake): Warms up all the chocolate flavors. If you can, grab Madagascar vanilla—it’s extra tasty.
- Unsalted butter: Lets you add just the right amount of salt. Plus, it makes things rich and velvety. Buttery styles from Europe work even better because they’ve got more fat.
- All-purpose flour: Holds up the brownies without making them dry or cakey. Don’t just scoop your flour or else you’ll get too much—spoon it in for the best measure.
- Espresso powder: Kicks up the chocolate taste without turning it into coffee. Makes the cocoa flavor deeper and richer.
- Semisweet chocolate (60-70% cocoa): This goes into the mousse, making it sweet but still deep and chocolaty.
- Heavy cream (36% fat): Necessary for fluffy mousse. Keep it cold—cold cream whips up lighter.
- Powdered sugar: Sweetens and keeps the whipped cream stable in the mousse layer. Fine sugar = smooth texture.
- Whole milk: Helps melt the chocolate for the mousse, so it turns out super creamy.
- Dark chocolate (65-70% cocoa): This is for the ganache. It makes the top extra rich and not too sweet.
 Pin it
Layer Breakdown
- Brownie Layer How-To
- Last step for the base, pour your finished batter into the pan you lined with parchment (leave enough paper hanging out so you can grab it later). Smoothing the batter into all the corners helps it bake up perfectly. Fold your dry stuff (after whisking it together to get out lumps) into the wet using big, slow motions—a gentle touch keeps your brownies chewy, not tough. Mix up melted (but not hot!) butter, then beat in sugar until blended and kind of gritty—don’t worry, it’ll dissolve. Crack in those eggs one by one, mixing after each to keep it all together. Add vanilla, stir until shiny and thick. Bake at 350°F ‘til the edges are set but the middle still looks a bit underdone.
- Making the Mousse Cloud
- Chop your semisweet chocolate as finely as you can—the smaller the bits, the smoother it melts. Pick 60-70% chocolate for balance. Heat milk until you see tiny bubbles forming, then pour it over the chocolate and don’t touch it for about half a minute. Then stir, starting in the middle, until it melts smoothly. While that cools, whip up chilled heavy cream with powdered sugar until it gets soft whipped peaks. Gently fold your cooled chocolate into the cream with a looping motion—you don’t want to knock out the fluff. Spread this mousse evenly over your cooled brownie base. Then let it chill in the fridge for two hours minimum, so it firms up.
- Ganache Finishing Touches
- Mix finely chopped chocolate and cream in a bowl. Melt it using short bursts in the microwave or a gentle double boiler. Stir after each go until you get silky, shiny chocolate. Let the mix cool until it’s still runny but thick enough to spread with a spoon. Pour it onto your cold mousse, then tilt the pan so it covers everything. Stick it back in the fridge for about an hour to let that top set up.
 Pin it
My first go at these taught me some patience. I thought I’d speed things up by tossing the warm brownies straight into the freezer, but all that did was make them sweaty and too soft to hold the mousse. Now, I just give myself time and let each layer cool naturally, usually spreading the process out through a chill afternoon. There’s something kind of relaxing about following all the steps. In the end, it’s not just about getting the best texture and look—but also about enjoying the slow, careful way simple stuff can become something pretty amazing.
Frequently Asked Questions
- → Can I get these brownies ready before I need them?
- Go for it! Making them ahead actually makes them taste better. Let them sit in the fridge covered overnight so the flavors can blend. Pull them out when you're set to share.
- → Why did my chocolate get stiff in the mousse?
- If your chocolate's too hot, it can go lumpy. Let it cool to room temperature, but keep it pourable. Start by mixing a spoonful of cream into your chocolate. That helps it blend smoothly before you fold in more cream.
- → Is it okay to freeze these brownies?
- The brownie part freezes fine, but the mousse and ganache layers don't really like the freezer. Serve these straight from the fridge within 4 days for the best taste and texture.
- → How can I cut these brownies without making a mess?
- Heat up a sharp knife in hot water, wipe it off, then slice. Wipe the blade and warm it again for every new cut. Let your brownies chill on the counter 10-15 minutes first for neater slices.
- → Can I swap semisweet for milk chocolate in the mousse?
- Totally. Milk chocolate makes the mousse sweeter and lighter in taste. If you try this, use a bit less sugar in the whipped cream so things don’t get too sweet.
- → Why does my mousse layer have a weird texture?
- Grainy mousse usually means your chocolate started to harden before you finished mixing. Make sure your chocolate's still smooth and just warm, then quickly but gently fold everything together.