
 Pin it
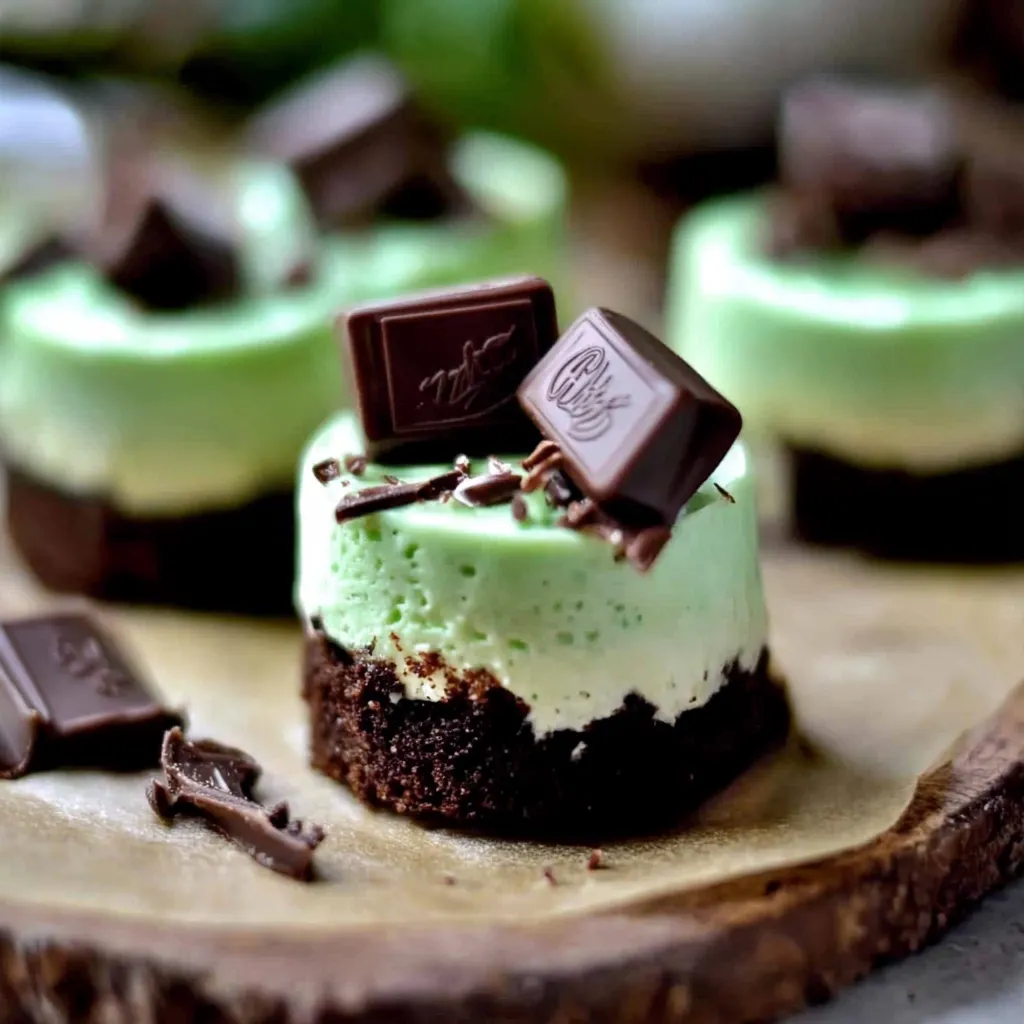
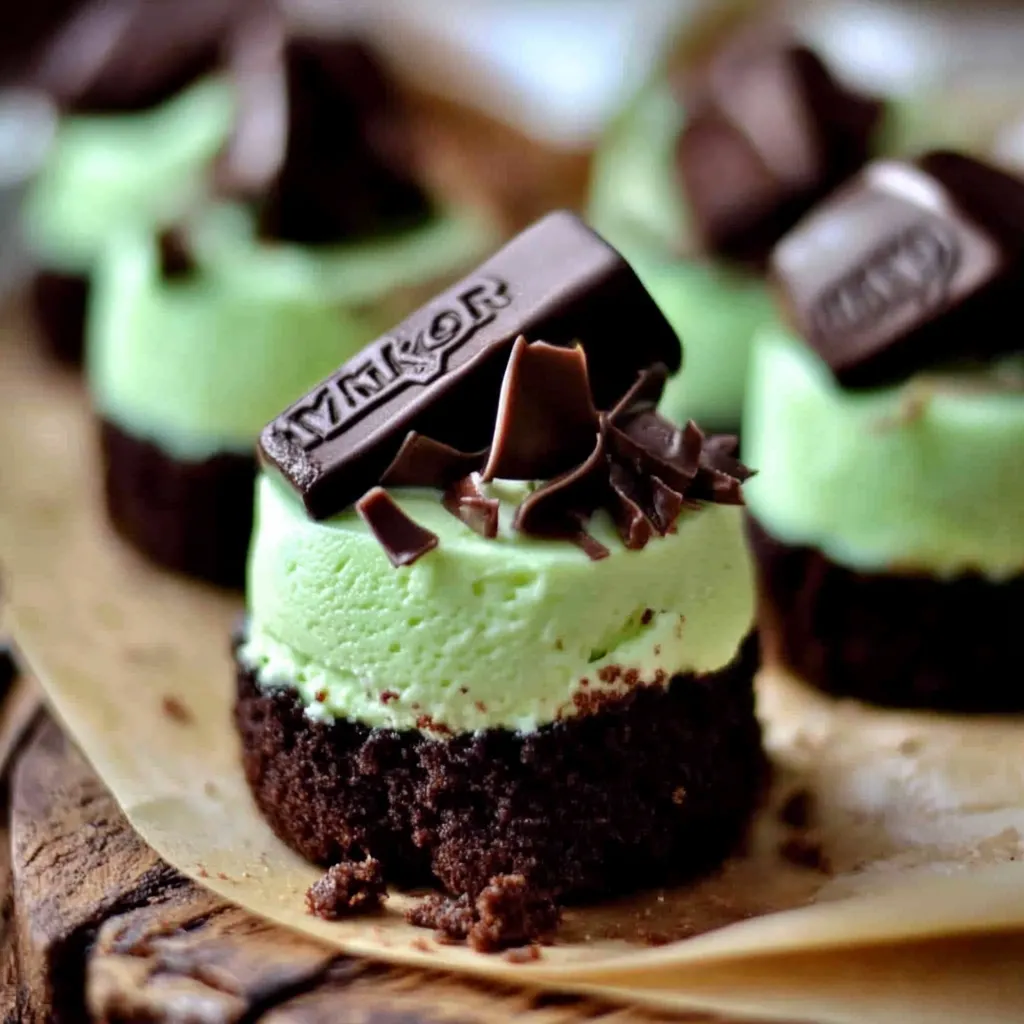
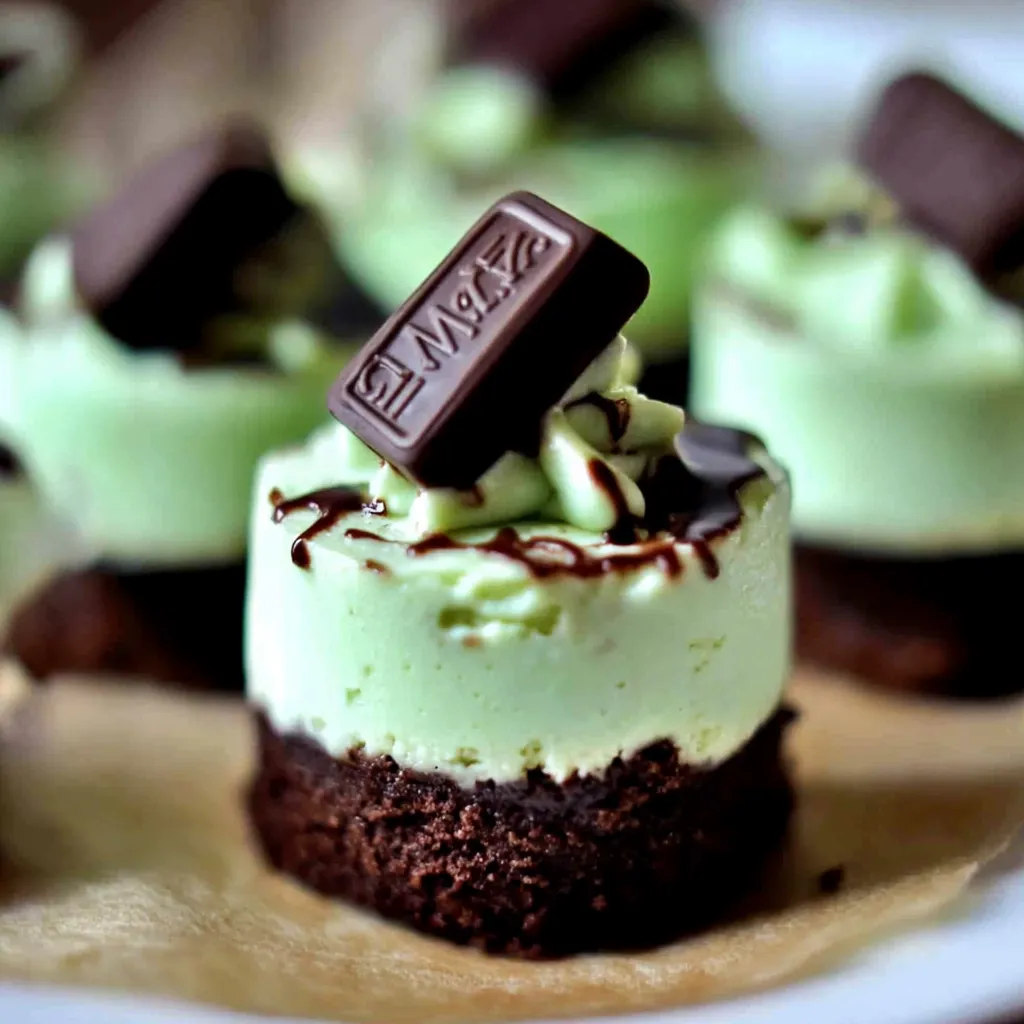
This luxurious Andes Mint Mini Cheesecakes creation turns those popular chocolate-mint candies into a dazzling dessert that expertly balances rich chocolate and cool mint flavors. I whipped these up for my daughter's birthday when she asked for "something minty with chocolate," and they've now become the most requested treat for our family celebrations.
I first tried making these during Christmas when I wanted something special that wasn't just another batch of cookies. The bright green cheesecake part topped with chocolate ganache looks so pretty that everyone always asks me how I made them.
Ingredients
- Chocolate graham cracker crumbs: Build a tasty chocolate base that works great with the mint
- Cream cheese: Go with full fat for the richest texture and taste
- Mint extract: Gives that fresh cool flavor without being too strong
- Green food coloring: Makes them look amazing and hints at the mint flavor
- Andes mints: Work as both pretty toppings and add genuine chocolate mint taste that's better than artificial flavors
- Chocolate chips: Pick good quality ones for your ganache to get the smoothest result
Step-by-Step Instructions
- Prepare the Pan:
- Heat your oven to 325°F and spray each spot in your mini cheesecake pan with cooking spray. Make sure you cover all the edges so the cheesecakes won't stick when you take them out later.
- Create the Crust:
- Stir the chocolate graham crumbs with sugar until well mixed, then pour in the melted butter. It should feel like damp sand and stick together when squeezed. Split it between all the spots and push down hard with a spoon to make a solid, even bottom layer.
- Mix the Filling:
- Whip the room temperature cream cheese with sugar for about 2 minutes on medium until it's totally smooth with no bumps. Then add the egg, mint extract, and green coloring on low just until mixed. Don't beat too much after adding the egg or you'll get air bubbles that cause cracks.
- Bake with Care:
- Pour the mint mixture over each crust, sharing it evenly and filling about 3/4 full. Bake for 20 minutes until the sides are firm but the centers still wobble slightly. Letting them cool slowly in a cracked-open oven stops them from cracking from quick temperature changes.
- Chill Thoroughly:
- Let the cheesecakes get completely cold in the fridge for at least 4 hours, but overnight works even better. This waiting time helps the flavors blend together and gives them the perfect creamy texture.
- Add the Ganache Topping:
- Melt your chocolate chips in 30-second bursts, stirring each time until completely smooth. Drop a big spoonful onto each cold cheesecake and let it spread out on its own. Right away sprinkle chopped Andes mints on top while the chocolate's still warm so they'll stick properly.
 Pin it
The chocolate topping really makes these treats stand out from regular cheesecakes. I found that waiting about 2 minutes after melting the chocolate before spreading it creates just the right thickness that flows nicely without running off or getting too hard.
Getting The Mint Just Right
Finding that sweet spot with mint can be tough. Start with what the recipe calls for and then taste the mix before adding more. Keep in mind that mint gets stronger after baking and cooling. If you want it milder, use just 1/2 teaspoon of extract. If you're crazy about mint, you can go up to 1 1/2 teaspoons without making it too overwhelming.
Storage and Make Ahead Instructions
These mini treats actually taste better with time, so they're great for making ahead. After they've cooled down completely, cover them and keep in the fridge for up to 5 days. I've noticed the mint flavor gets even better after sitting for a full day. If you need to store them longer, freeze them without the chocolate topping in a sealed container. Thaw them in the fridge overnight, then add fresh chocolate topping and Andes pieces just before serving.
Serving Suggestions
Though these mini cheesecakes look great by themselves, you can dress them up for special events. Try serving with a small dollop of lightly sweetened whipped cream that has a hint of mint mixed in. For holiday parties, arrange them on a tray with some fresh mint leaves and a light sprinkle of powdered sugar. They also taste amazing with a small cup of espresso or a glass of sweet dessert wine to finish off a fancy dinner.
 Pin it
These mini cheesecakes bring together chocolate and mint in the perfect way, and they'll wow anyone who tries them.
Frequently Asked Questions
- → Can I make these Andes Mint Cheesecakes in a regular muffin tin?
You can definitely use a standard muffin tin with paper liners instead of a mini cheesecake pan. You might need to tweak cooking time a bit, so keep an eye on them and check when the middle looks just set.
- → Can I substitute the mint extract?
You can swap in peppermint extract instead of mint extract, though it will taste a bit different. If you don't want any mint flavor at all, try vanilla extract for a simple chocolate cheesecake version.
- → Do I need to use green food coloring?
Green coloring is just for looks and totally optional. Your cheesecakes will taste exactly the same without it, so feel free to skip it if you don't want to use food dye.
- → How long do these mini cheesecakes stay fresh?
Kept in a sealed container in the fridge, these mini treats stay good for about 5 days. You can also freeze them for up to 3 months and just thaw them in the fridge when you want to eat them.
- → Can I make these cheesecakes ahead of time?
For sure! These little cheesecakes work great made ahead. You can make them 1-2 days before you need them and keep them in the fridge. Just add the chocolate topping and mint candy bits right before serving for the best look.
- → What if I can't find Andes mints?
If you can't get Andes mints, try using any other mint chocolate candy. Mint chocolate chips, chopped After Eight thins, or even some crushed candy canes mixed with chocolate chips will work in a pinch.