
 Pin it
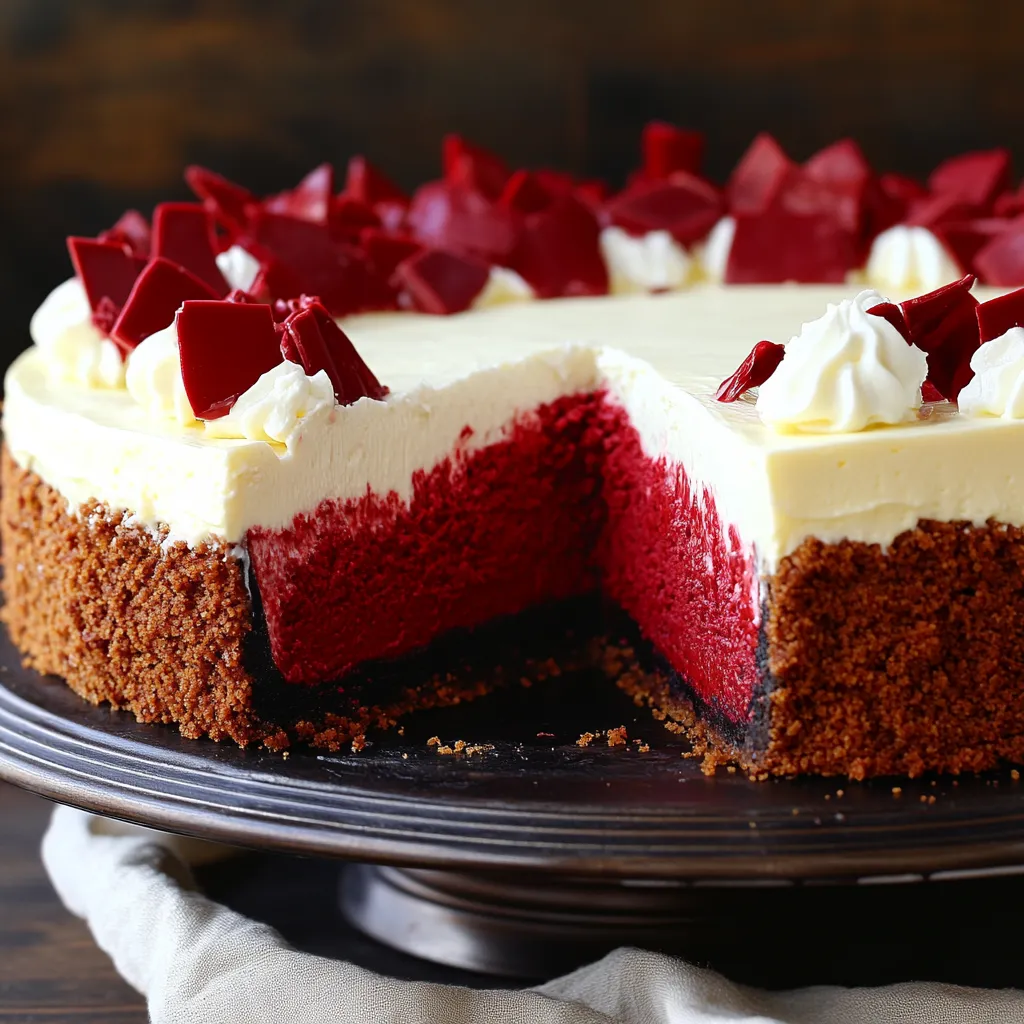
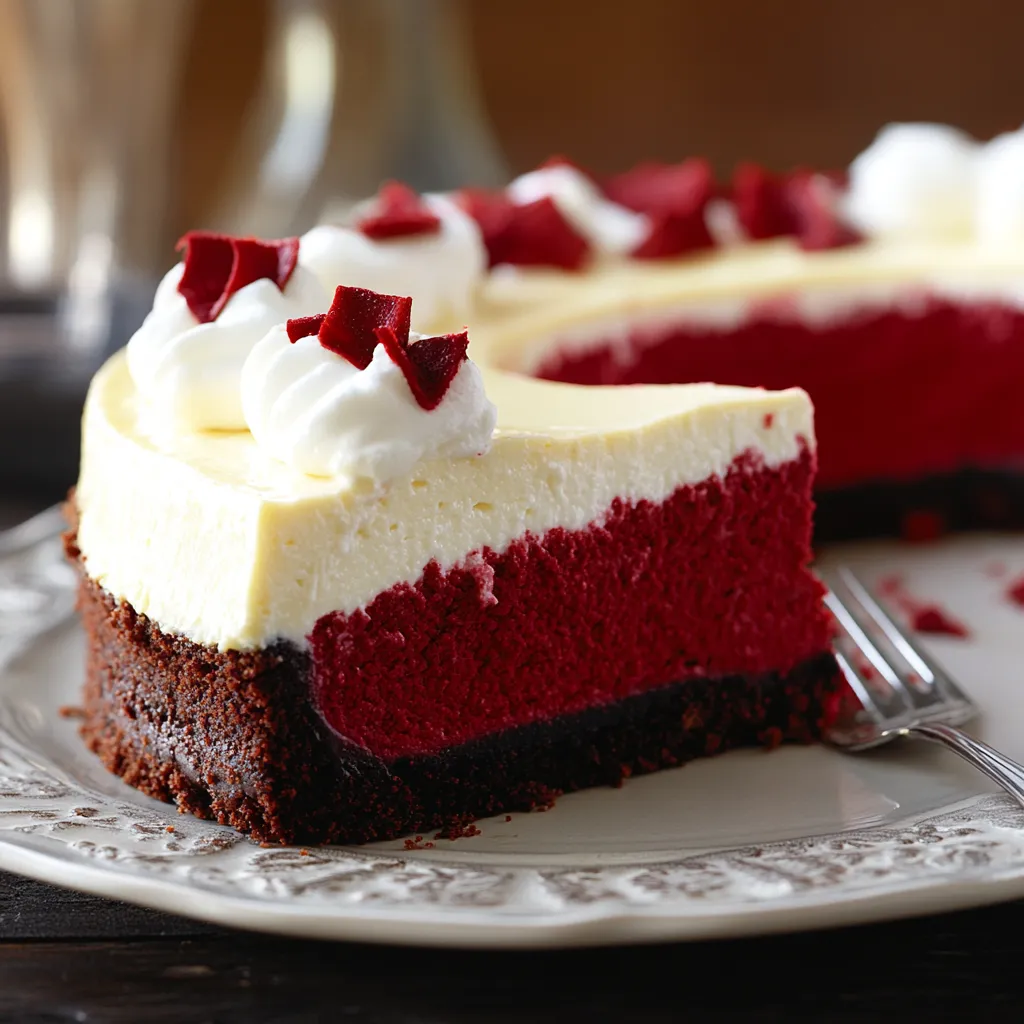
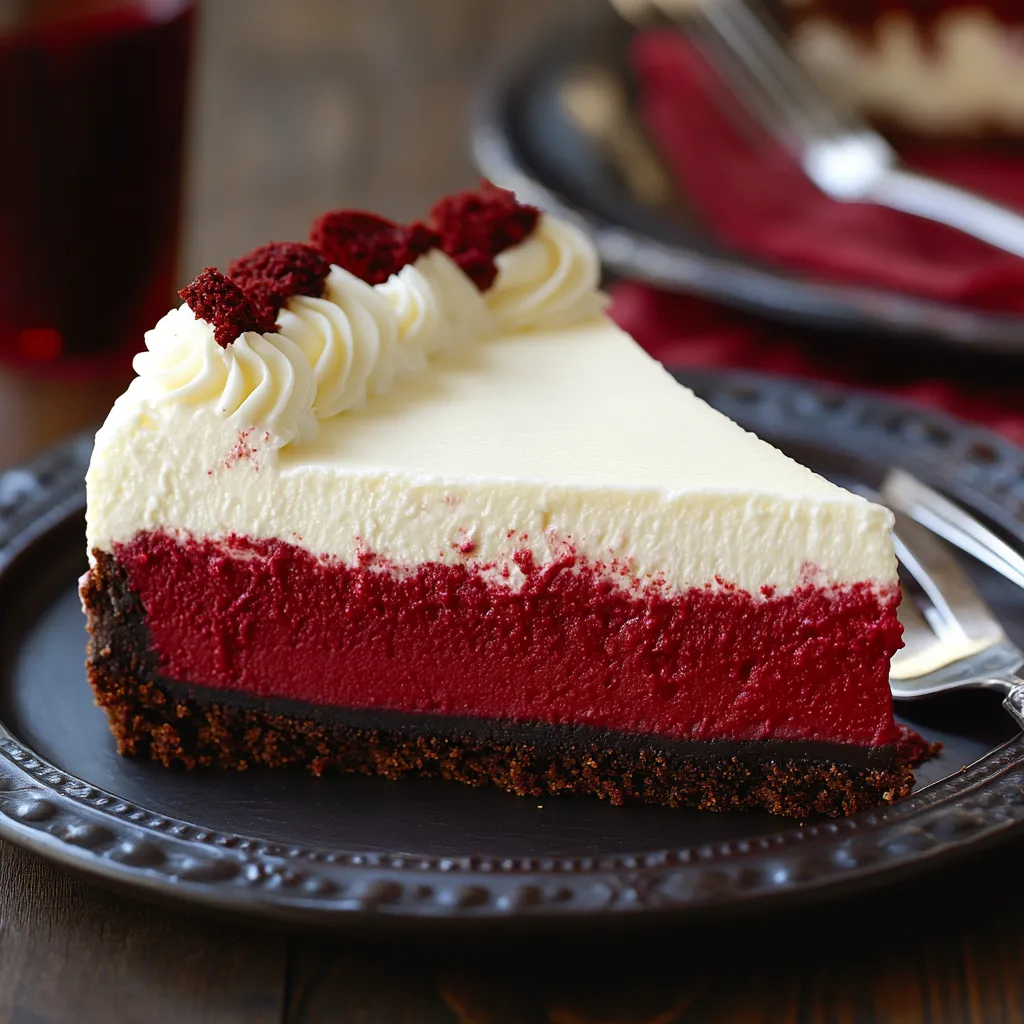
Mash up two crowd-pleasers and you get this fusion of red velvet and cheesecake. It’s crazy creamy and just melts right in. The bold red and soft white layers really pop on a plate and get people talking. Hints of cocoa run through every bite and the rich cream cheese flavor sticks around even after you’re done eating. Toss some chocolate chips on the top and you’ve got surprise sweet bites that play so well with the creamy base. Every forkful brings together a little tang, a little sweet, and a lot of wow—perfect way to make your get-together unforgettable.
Made this last year for my sister’s birthday bash and everyone’s still raving. The striking layers looked so cool that people had to snap pictures before eating. What got me was how chilling it overnight made everything taste even richer the next day—leftovers never last long now!
Stunning Key Ingredients
- Pure vanilla extract: Rounds out the flavors. Go for the real stuff—none of that fake business—if you want that deep, classic taste.
- Graham crackers: They’re the sweet, crisp base that balances out the creamy filling. Honey grahams? Even more flavor magic happens.
- Unsweetened cocoa powder: Brings in that subtle chocolate kick without taking over. Dutch-processed is smooth and less tangy for laidback chocolate vibes.
- Buttermilk: Helps add that gentle tang and keeps everything soft. The acid also helps the cake layer rise just right.
- High-quality cream cheese: That’s your main player. Full-fat blocks (not the soft kind) give you the dreamiest, richest filling ever.
- Red food coloring: Gives you that classic red color. Gel versions are strong and don’t water down the batter.
Easy-To-Follow Steps
- Bake It to Finish:
- Layer the red velvet mix over your crust, spreading it out. Spoon the cream cheese layer on next, making sure it’s even. Pop the springform pan onto a big baking sheet, just in case you get leaks. Slide everything into a hot oven until the edges firm up but the center still jiggles a little. When it’s done, let the cheesecake chill out in the oven with the door cracked to stop cracks. Then move it to the fridge and leave it overnight—trust me, the taste and texture turn perfect.
- Make That Cheesecake Layer:
- Let your cream cheese warm up to room temp so it mixes smoothly. Gradually add sugar as you beat at medium speed. Pour in vanilla for mellow flavor. Beat eggs in one by one—don’t rush it. Remember to scrape the bowl. Want extra sweetness? Stir in white chocolate chips; they’ll melt partway and leave gooey bits.
- Whip Up the Red Batter:
- Mix cocoa powder, flour, and leaveners in a bowl. In a stand mixer, beat butter and sugar until it’s airy and pale. Drop in eggs, letting each blend in before the next. Add buttermilk and your red coloring, stirring until the batter’s all one color. Gently fold in the dry mix with a spatula and stop when it’s just mixed—overmixing means tougher cake.
- Kick Off With the Crust:
- Stir melted butter and sugar into graham cracker crumbs until it all looks like damp sand. Dump it into a springform pan and press down with a flat cup for a neat layer. Bake until it smells fantastic and turns golden (about 10 minutes). Let it cool fully before you pour in the filling.
 Pin it
Must-Know Basics
Getting the texture just right is all about balancing how wet or dry your mix is. If you beat everything too much, you’ll work in air bubbles. That puffs up the cake while baking, then it slumps down and cracks when it cools. Eggs add body and help make it nice and creamy—add them slowly so they blend well with the cream cheese and fats. Oh, and letting it cool slowly from the oven all the way to the fridge is key. That’s what gets you smooth, sliceable layers every time.
Awesome Pairings
Elevate your dessert game by throwing on the right toppings. Go with fresh strawberries or raspberries for a pop of brightness—they balance out the thick, rich filling. Scoop on some fluffy whipped cream for extra comfort and sweetness. If you’re a chocolate fan, sprinkle white chocolate shavings across the top for a snow effect or drizzle dark chocolate for a dramatic look. Every one of these takes your creation up a notch and makes dessert time way more fun.
Pro Tips
Bring all your refrigerated items out early so they’re not cold—this helps everything blend super smooth. If you’ve got a springform pan, wrap it in foil and place it in another pan of hot water. The gentle steam helps bake everything evenly and keeps cracks away. Let the finished cheesecake sit for an hour in the turned-off oven with the door a bit open, then chill in the fridge to avoid sudden temp swings.
 Pin it
My first go wasn’t perfect. I hurried the cooling, so got cracks and a grainy texture. Now I always start a day ahead so there’s plenty of time to chill and set. That patience makes all the flavors swing together and turns even a small event into something people remember.
Frequently Asked Questions
- → Can I make this Red Velvet Cheesecake ahead of time?
- Definitely, you’ll get even better flavor if you chill it overnight. You can make it a couple of days early and let it hang out in the fridge.
- → Why did my Red Velvet Cheesecake crack?
- Cracks show up sometimes if you stir too much or bake it too hot. Let everything come to room temp, stir just until mixed, and cool it inside the oven before pulling it out.
- → Can I use less food coloring in this Red Velvet Cheesecake?
- Go for it! You only need enough for a splash of color. Try beet powder or just less dye if you like. The taste won’t change.
- → What's the best way to slice Red Velvet Cheesecake?
- Use a hot, clean knife—dip it in warm water, wipe off, slice, then repeat every time. Keeps the slices looking sharp and neat.
- → Can I freeze leftover Red Velvet Cheesecake?
- Yes. Cut slices, then wrap them in plastic and foil or use a sealed container. It’ll keep for a couple months—just let it thaw in the fridge before munching.
- → What can I use instead of graham crackers for the crust?
- Try digestive biscuits, vanilla cookies, or chocolate wafers instead. Any of them work great for the crust on this one.