
 Pin it
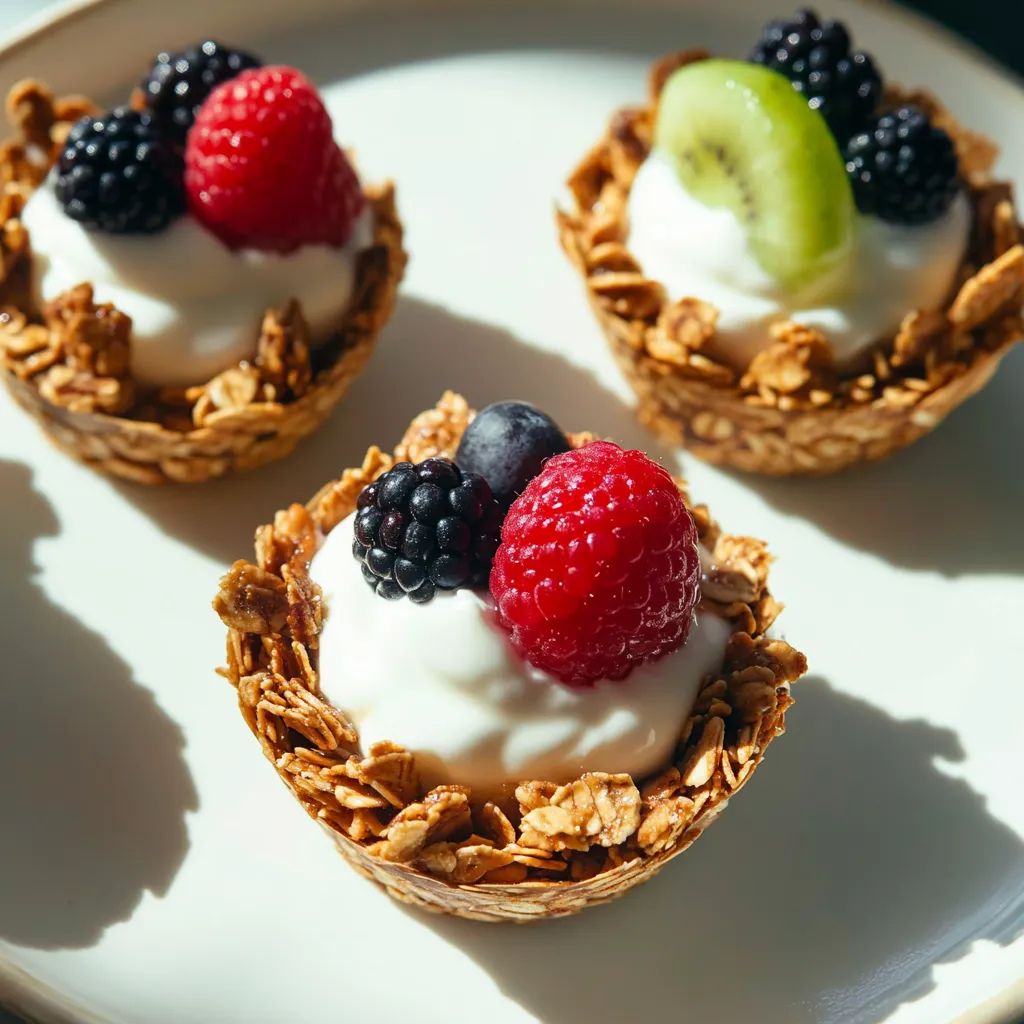
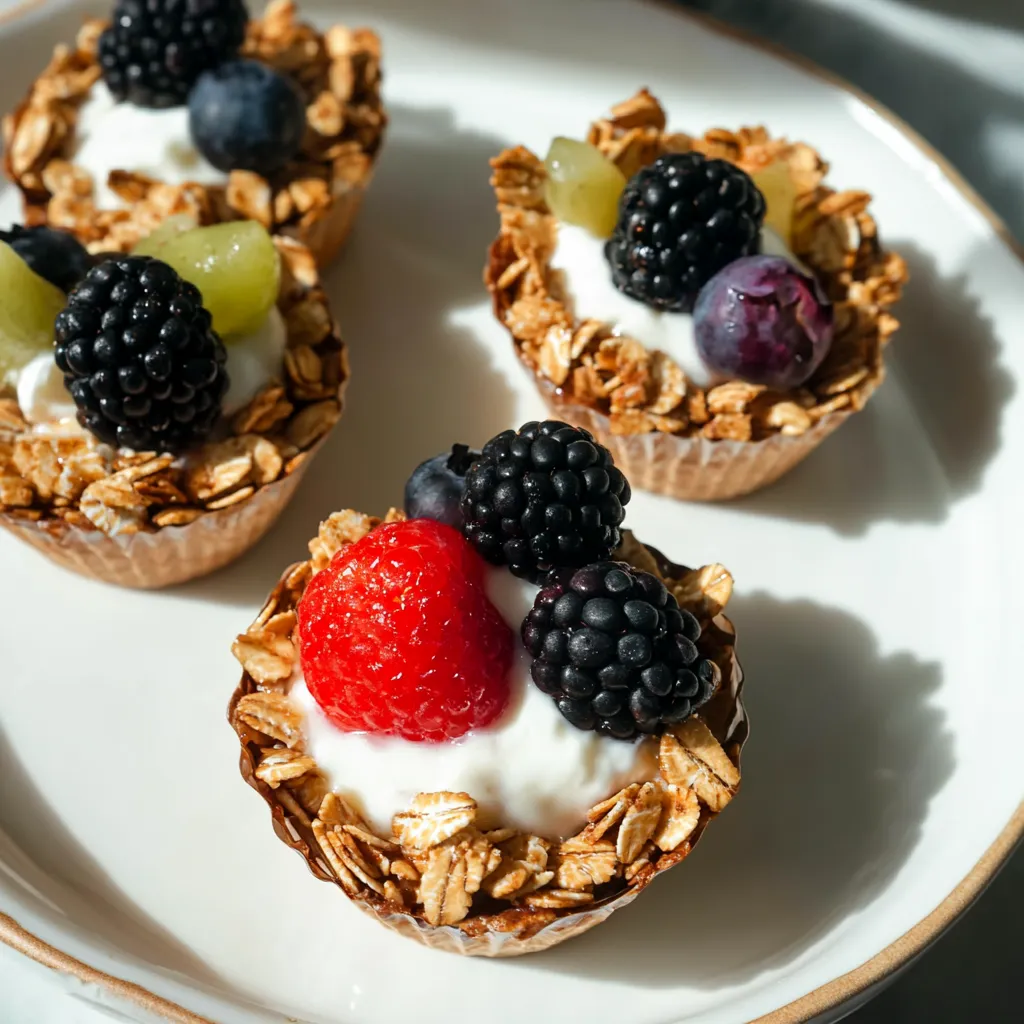
Start your morning right with these crunchy homemade cups filled with smooth yogurt and juicy fruit. They've got the perfect balance - crispy edges with just enough give in the middle to create a tasty edible container that turns regular yogurt into something you'll look forward to eating.
I came up with these yogurt cups when I got bored with our usual breakfast routine. Now my kids ask for them every week, and they've become our favorite quick morning meal when we need something filling that doesn't take forever to make.
Ingredients
- Rolled oats: They form the sturdy foundation and give you that nice mix of chewy and crunchy
- Peanut butter: Holds everything together while adding some protein and a rich taste
- Maple syrup: Gives a natural sweetness and helps everything turn golden brown
- Vanilla extract: Brings out all the cozy flavors
- Cinnamon: Adds a gentle warmth that works really well with the peanut butter
- Salt: Cuts through the sweetness and makes all other flavors pop
- Yogurt: Makes the creamy filling (go for Greek if you want extra protein)
- Fresh fruit: Adds natural sweetness and bright colors
- Chia seeds: Give you those healthy omega-3s and a nice little crunch
Step-by-Step Instructions
- Get Everything Ready:
- Heat your oven to 350°F and really coat 6 muffin cups with coconut oil. Don't be stingy with the oil - it stops sticking and helps get that nice golden outside.
- Combine Your Ingredients:
- Put rolled oats, peanut butter, maple syrup, vanilla extract, cinnamon and salt in a bowl. Stir until you can't see any dry oats. You want it a bit sticky but still somewhat crumbly.
- Shape Your Cups:
- Split the mix evenly between the 6 oiled muffin spots. Use your fingers or a spoon to push it against the bottom and sides while making a hollow in the middle. Try to keep the walls even all around.
- Bake Them Up:
- Bake for 12 to 15 minutes, but keep an eye on them after 10 minutes. You want the edges turning golden but not dark brown. They'll still feel a bit soft when hot.
- Let Them Set:
- Let the cups sit in the pan for 5 minutes - not more, not less. This timing matters because it lets them firm up enough to keep their shape. Slide a butter knife around the edges and carefully take them out to a cooling rack.
- Put It All Together:
- When they're completely cool, fill each cup with a big spoonful of yogurt. Add berries, banana slices, or whatever fruit you like. Sprinkle some chia seeds on top for extra crunch and nutrition.
 Pin it
I love these most when filled with vanilla Greek yogurt and topped with fresh blueberries from our backyard. There's something really special about how the juicy berries mix with the creamy yogurt and crunchy oat cup.
Make Ahead Options
These cups will stay fresh in a sealed container at room temperature for up to a week. Put parchment paper between them so they don't stick together. You can even freeze them for up to three months if you want. Just let them thaw naturally before you add your fillings.
Flavor Variations
You can change up this basic recipe so many ways. Try almond butter or sunflower seed butter instead of peanut butter for different tastes or if you've got allergies. Toss in some mini chocolate chips before baking if you want something sweeter. Play around with spices like cardamom, nutmeg, or ginger to match the seasons.
Nutrition Boosters
Turn these cups into even healthier treats by adding 2 tablespoons of ground flaxseed or hemp hearts to your oat mixture. Want more protein? Mix some collagen powder into your yogurt before filling the cups. Top with pomegranate seeds, chopped pistachios, or cacao nibs for extra nutrients and interesting textures.
 Pin it
These yogurt cups aren't just good for you - they'll become a breakfast your whole family will ask for again and again!
Frequently Asked Questions
- → Can I prepare these granola cups in advance?
Definitely! The granola shells stay good in an airtight jar for about 5 days. Add yogurt and toppings right before eating to keep the crunch intact.
- → What can I swap peanut butter with?
Sure thing! Almond, sunflower seed, or cashew butters are great backups. They each bring a slightly unique taste while still doing the job to hold things together.
- → What kind of yogurt should I use?
Any kind works! Greek yogurt is richer in protein and thicker, while plant-based options like almond or coconut yogurt are perfect for a dairy-free spin.
- → What’s the trick to stop these from sticking in the pan?
Make sure to grease the pan well with something like coconut oil. Let them sit for a few minutes after baking, and use a knife to gently loosen them up.
- → Which fruits are best for toppings?
Go classic with mixed berries, mix it up with tropical mango and pineapple, or cozy up with apple and cinnamon. Adding a touch of honey or syrup brings extra sweetness.
- → Are the baked cups freezer-friendly?
You bet! They freeze great for up to 3 months if stored in a sealed container with parchment between layers. Let them thaw at room temperature before loading them up with yogurt.